In this article, we will be creating an azure IoT hub using the azure portal so we can avoid confusion for beginners however Azure IoT Hub can be created using:
- Azure CLI
- SDK
- API
- ARM
Prerequisites To create any Azure service, we need an active Azure subscription, whether it’s a paid or trial subscription. I am assuming you have an active Azure subscription
What is Azure IoT Hub?
Step 1: Go to the Azure Portal
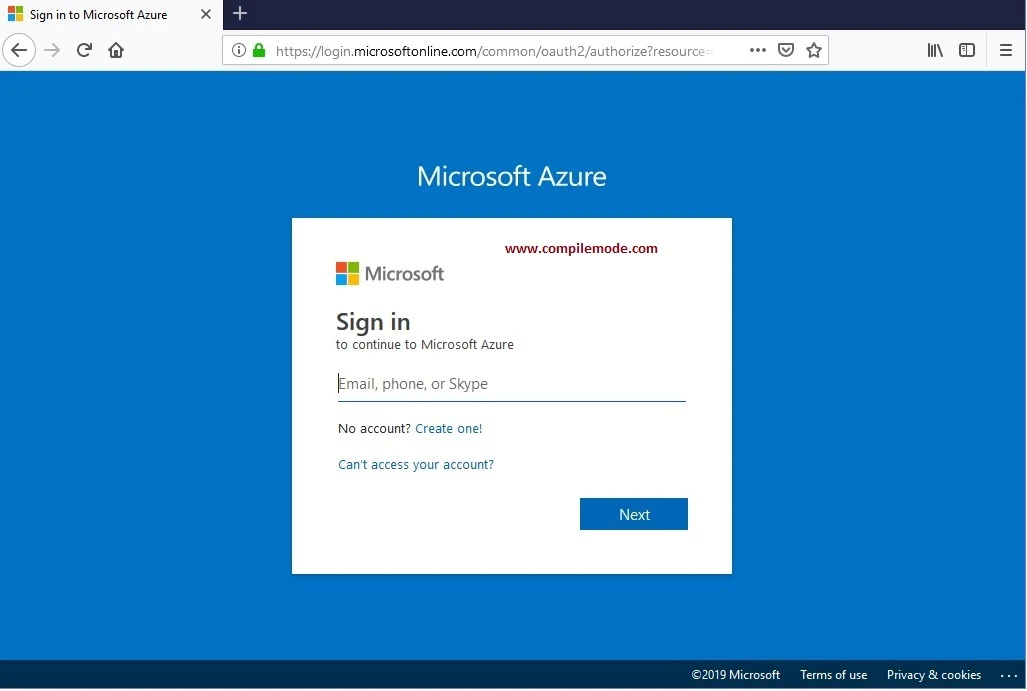
Navigate to the portal.azure.com using your browser and login into the portal with valid credentials, as shown in the following image:
After a successful login, the page will be redirected to the Azure portal, by default, the dashboard page is set as:
Step 2: Create Azure IoT
Find the create resource option which can be found on the left top side of the portal as shown in the following image or follow any other option which you may know to create the resource (service) in the Azure portal:Provide required details as shown in the preceding image:
- Subscription: Choose the available azure subscription which you want to use for creating service from drop-down list
- Resource Group: Choose an existing resource group or create a new resource group that you may want to use.
- Region: Choose the deployment location for IoT hub device provisioning from the given list. However, the device provisioning service is global and associated with any specific location, but you must specify a location for the resource group where the metadata associated with the service profile will reside.
- IoT Hub Name: Name of the IoT hub service which must contain only alphanumeric characters or a hyphen.
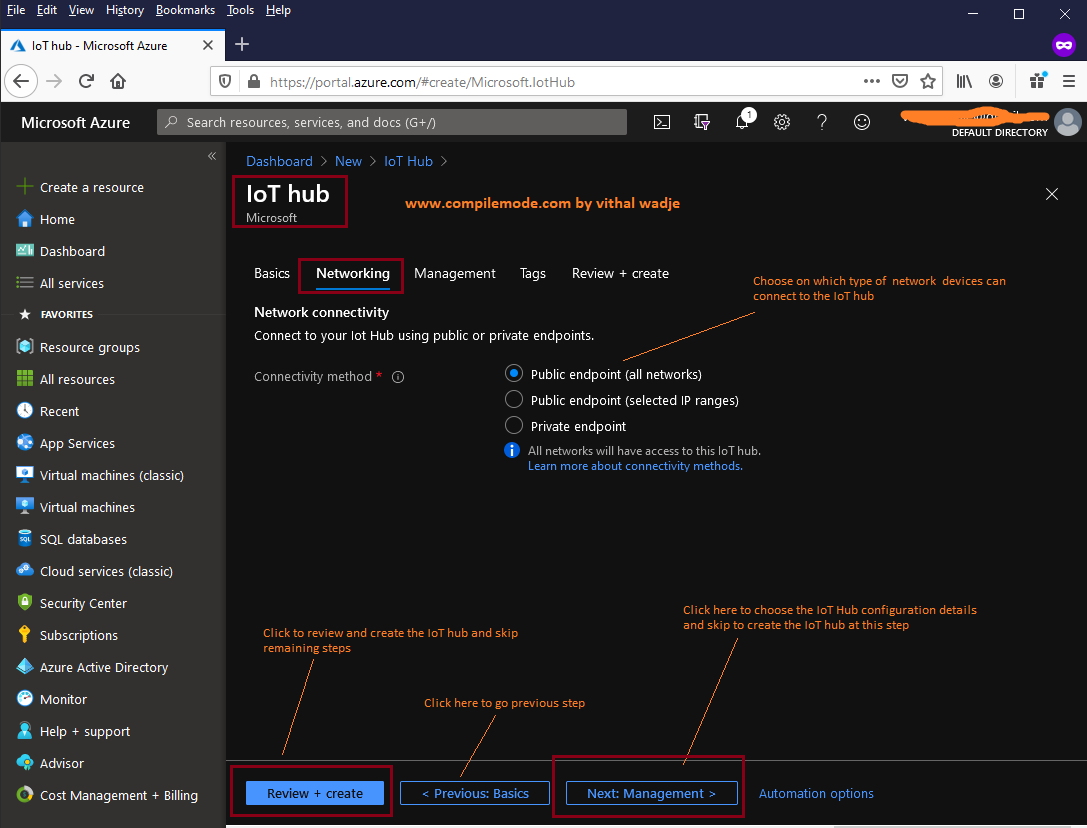
In the above image, we choose the connectivity method for the IoT hub which decides which network the devices can connect to the IoT hub, there are three methods:
- Public Endpoint all Network
- Public Endpoint selected IP addresses
- Private Endpoint
Public Endpoint all Network
This option allows us to connect devices to the IoT hub on all public networks for whoever has access to public URI and the required credentials.Public Endpoint selected IP addresses
Even you have a public endpoint (URI) but want to restrict devices, you should connect from a specific IP address. Then you can define the range of IP addresses. The IoT hub allows you to connect only to devices that fall within the defined IP address range. This option gives the useful feature to allow only known networks to connect to the devicesPrivate Endpoint
This is the URI or endpoint which allows us to connect devices over the private network, which gives the robust security between devices and IoT hub communication
Once you choose your intended connectivity method, click on the next step which shows the step to configure the scalability of the IoT hub as:
Once you choose your intended connectivity method, click on the next step which shows the step to configure the scalability of the IoT hub as:
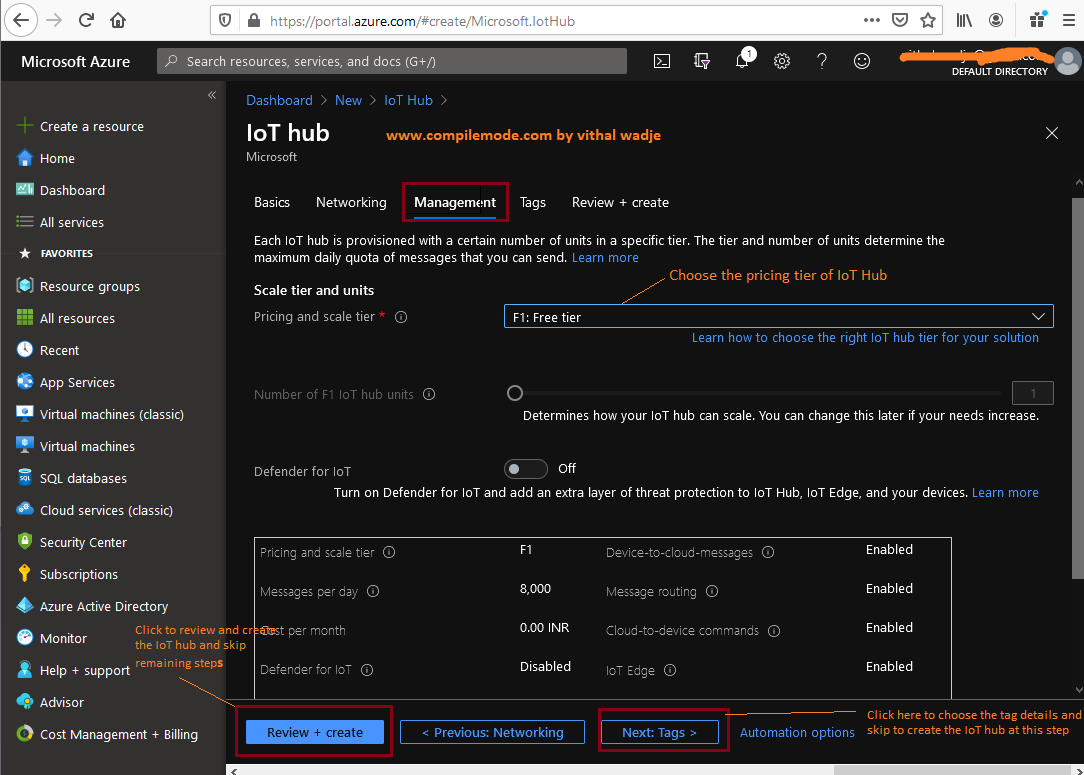
The preceding management step allows us to define the scalability and security of the IoT hub with the help of the following options:
- Pricing and Scale Tier
- IoT Hub Units
- Defender
Free Tier
Basic Tier
The basic tier is sub-categorized into the three types as
- B1
- B2
- B3
Standard Tier
The standard pricing and scale tier provides the most advanced features and scales for the incoming IoT messages, The standard tier subcategorized into the three types as:
- S1
- S2
- S3
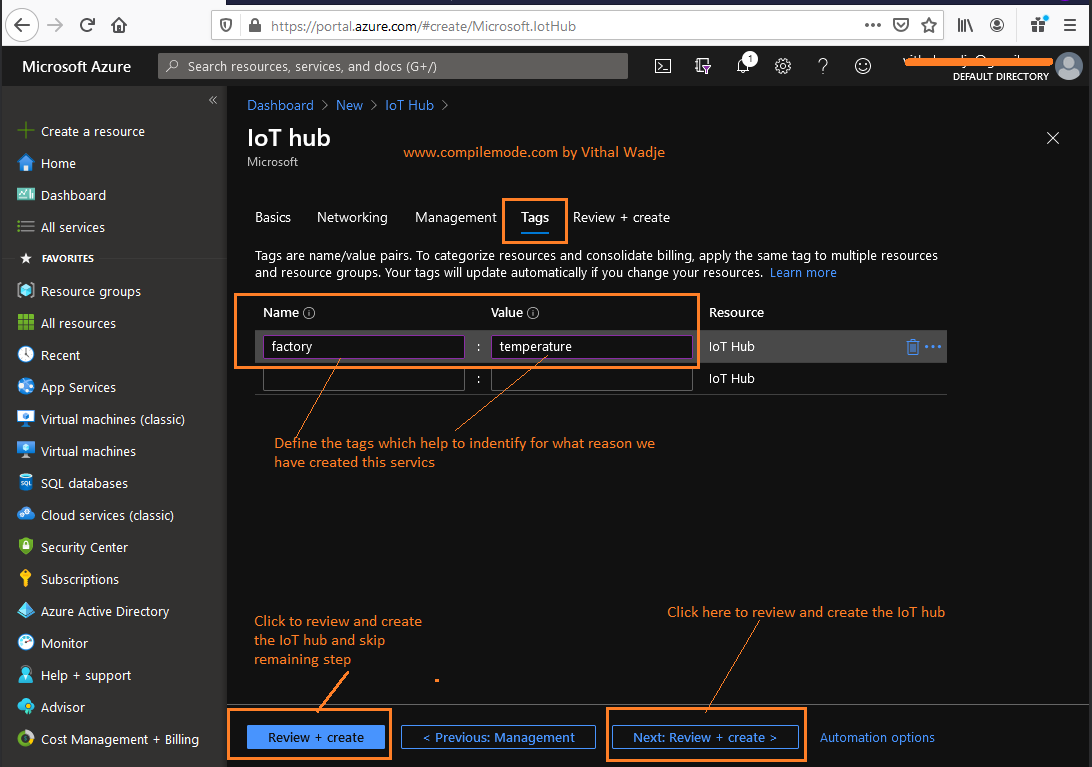
The tagging helps to identify or categorize the services across the line of applications, after providing tags details, click on the next step review and create, it will show the following screen to review the details before creating the service:
After reviewing details, click on the create button, it will take some time to create the service. Once the service is created, the status can be notified on the notification icon as shown in the following image:
Now click on the Go to resource button, you will be redirected to the newly created IoT hub service as shown in the following image:
Let’s learn about the preceding Azure IoT hub key sections in brief, listed below:
The overview section of the IoT hub is like a dashboard where you can see an overview of the service details, including the charts for incoming messages, status, etc.
- Overview
- Certificates
- Built-in Endpoints
- Query Explorer
- IoT Devices
- Automatic Device Management
- Messaging
- Security
- Monitoring
Built-in Endpoints
This section contains the details which allow us to use the IoT hub as an event hub. The event hub compatible connectionString gives almost the same functionality as an event hub without creating any instance of the event hub.
Query Explorer
IoT Devices
Automatic Device Management
Messaging
Security
Monitoring
This section allows to monitor the logs related to the IoT hub, you can set any filter or rule for monitoring and create the alerts
I hope this article is useful for creating the Azure IoT hub service using the portal. In this series of Azure IoT, next, we will learn about creating Azure IoT hub using PowerShell.
Articles you may interested


Post a Comment